Beyond covering vehicles and supplementing as a storage facility, garages don’t receive the attention they deserve. It is often forgotten that they require maintenance to keep them in pristine condition, such as installing vapor barriers. These barriers help to control the temperature inside the structure, and they happen to be very important.
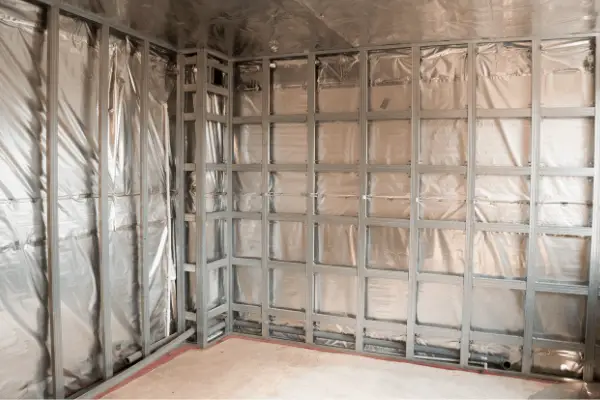
An attached garage doesn’t require vapor barriers as the house walls help keep vapor from entering the garage. However, detached garages don’t have the same protection and require the installation of vapor barriers. These barriers help to maintain a garage at optimal temperatures and keep it free from rot.
This article will discuss what you should consider when installing vapor barriers in your garage, such as which parts of the walls should have vapor barriers, common vapor barrier materials and their permeability, and when to replace your vapor barriers.
Should You Install a Vapor Barrier in a Garage?
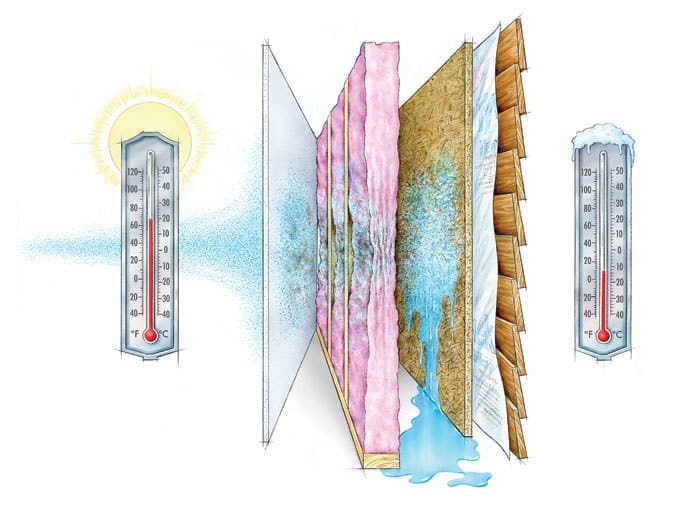
Every structure requires proper vapor barriers as they help keep the bulk of water and vapor from entering the house while also allowing vapor from inside the house to escape outside. As a result, the room temperatures are often lower compared to outside temperatures during warmer weather.
In the long run, garage structures with vapor barriers tend to avoid rot more than those without barriers. The barriers also help trap the heat in the garage during winter, which reduces energy costs.
An attached garage relies on the vapor barriers installed in the house walls to deal with any moisture problem. For a detached garage, however, the vapor barriers are required to help deal with moisture issues.
Without vapor barriers, your garage can experience the following issues:
- Wet and moist walls
- Damp air
- Bacteria and mold infestation
- Pests and termites
Where to Install Vapor Barriers
Vapor barriers prevent moisture and water from entering walls during cold seasons. Without these barriers, moisture can condense and turn into liquid within the walls, leading to rot and decay. As a result, the barriers should be installed on walls exposed to the prevailing weather conditions.
Climatic conditions determine where to install the vapor barriers in your garage. If you reside in a cold climate, it’s best to have vapor barriers installed on the inner side of the walls. In places where the temperatures are warm with high humidity, and air-conditioning is required, it is best to have your vapor barriers on the outer side of the wall.
Vapor barriers are permanently installed, and they are typically only removed when they’re damaged. Therefore, it’s essential to place them where they will be most effective.
Here is a look at different climates and where vapor barriers should be installed in all of them:
| Climate | Where to Install Your Vapor Barrier |
| Tropical Climates | On the outer side (the warmer side) |
| Dry Climates | On the inner side (the cold side) |
| Moist Subtropical Mid-Latitude Climates | On the outer side (the warmer side) |
| Moist Continental Mid-Latitude Climates | On the outer side (the warmer side) |
| Polar Climates | On the inner side (the warmer side) |
| Highlands | On the outer side (the warmer side) |
(Source: How Stuff Works and Insulation Institute)
The Importance of Permeability
Permeability in vapor barriers refers to the extent to which these barriers allow water vapor to pass through them. This transmission of moisture is rated in perms. Materials that don’t allow much vapor to pass through them are said to be impermeable.
The transmission of moisture results from vapor pressure, which is caused by the presence of humidity on a surface. As a rule of thumb, moisture will always move from an area with high vapor pressure to lower vapor pressure.
A sufficient vapor barrier material shouldn’t allow much vapor diffusion to take place. A vapor barrier material with a higher perm rating means it allows a large chunk of vapor to pass them, rendering it very permeable.
(Source: Understanding Permeability)
Common Vapor Barrier Materials and Their Permeability
The best vapor barrier materials are the ones with lower permeability, as this means less vapor will pass through them. Vapor barrier materials are classified by the International Residential Code as follows:
- Class I
- Class II
- Class III
Class I – These are known for their lower permeability with around 0.1 perms or lower. They don’t allow much water or vapor to pass through them and are widely used in many walls.
These barriers are made from the following materials:
- Polyethylene Films – This is the most widely used vapor barrier material on many walls. The material should be installed beneath the trusses and rafters on the inside of a garage, a task that can be achieved easily by using staples. The material needs to be at least 0.2 mm thick.
- Rubber Membrane – This material doubles up as a vapor and water barrier due to its waterproof features. Like the polyethylene films, the rubber membrane should be installed beneath the trusses and rafters inside a garage.
Class II – These are also referred to as semi-impermeable vapor barriers. Their permeability falls between 0.1 perms to 1.0 perms.
The materials that qualify as Class II vapor barriers are:
- Unfaced Extruded Polystyrene – This material works as a vapor barrier and insulation. The foil face cover makes it water and vapor resistant, while the plastic lamination offers strength. The 2-inch thick sheet is installed using glue, making it one of the easiest to install vapor barrier materials.
- Vinyl Wall Coverings – The wallpapers make a perfect semi-impermeable vapor barrier and are very easy to install. The thin sheets of fabric backing layer are very strong and help to prevent vapor from passing through. However, they’re not ideal for air-conditioned spaces.
(Source: The Balance Small Business and Home Guides)
Class III – The materials in this class have a medium permeability, with their rating falling between 1.0 perms to 10 perms. Some of the materials in this class are not considered the best vapor barriers, but they still have some desired qualities.
Class III vapor barrier materials include:
- Latex-Based Paints – Coating your walls with latex-based paint helps to prevent moisture and vapor from getting in. The paint blocks all the small spaces and lasts longer. The thick latex is what gives this paint a competitive advantage over other wall paints.
- Extruded Polystyrene (XPS) – XPS is an excellent vapor barrier and has outdone EPS in this matter due to its lower moisture permeability. It doesn’t require any technical skills to install and has a longer lifespan as well.
(Source: Plymouth Foam)
When to Replace Your Vapor Barrier
Every vapor barrier has a different lifespan. Some, like thinner plastics, are a perfect short-term solution and can be replaced after three years or less. However, virgin reinforced polyurethane can last up to 20 years when properly installed. Replacing your vapor barriers should only be done after a thorough inspection.
If you’re handy and have the right experience, you can handle this task by yourself. However, it’s best to call in a professional even though it might cost you more. This way, you will be guaranteed excellent service with minimal to no damage to your walls.
If the following signs start to show up, it’s time to replace your vapor barriers:
- The walls become moist during the night
- The barriers have been damaged by rodents
- Your crawlspace is experiencing water problems
(Source: Sentinel Pest)
In Conclusion
Installing the best vapor barriers in your garage walls will significantly reduce moisture problems that might lead to rot and decay. Vapor barriers are chosen according to their permeability and how easily they can be installed. If they become damaged or wear out, they should be replaced immediately with new ones.